...
- Es muss die Fläche teilen, indem es geschlossen wird oder indem jedes Ende außerhalb der Fläche endet.
- Es muss sich auf der zu teilenden Fläche befinden.
Beispiele:


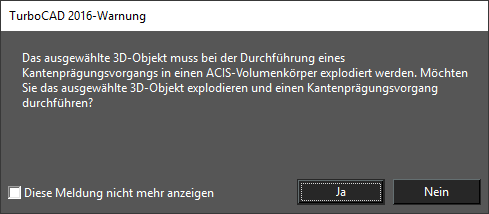
Einfache Volumenkörper wie z. B. Kugeln, Quader und Zylinder müssen in einen ACIS-Volumenkörper explodiert werden, damit das Werkzeug Kante prägen funktioniert. Wenn das Objekt vor der Auswahl nicht explodiert wird, erhalten Sie bei Auswahl der ersten Kante folgende Warnung:
The imprinting object must meet the following criteria:
- It must bisect the face either by being closed or by having each end terminate beyond the face.
- It must be on the face to be bisected.
Examples:

Primitive solids such as spheres, boxes, and cyliders must be exploded into an ACIS Solid in order for the Imprint Edge tool to work. If the object has not been exploded prior to selection you will be prompted with the following message when you select the first edge.

To use the Imprint Edge tool:
- Select the tool.
- Select the ACIS object which is to be imprinted.

- If you wish to delete the source object for the edge select the Delete source option in the Local menu or the Inspector bar. This option is on by default
- If multiple faces need to be selected, select the Select faces to be imprinted option in the Local menu or the Inspector bar.
- If the Select faces to be imprinted option is on select the desired faces, then click Finish.

If you accidentally select the wrong face/s use the Deselect all selected faces option in the Local menu or the Inspector bar, or click again on the faces you wish to deselect. - Click any edge you wish to imprint.

- Repeat step 7 as many times as you need.
- Click Finish after you have select all the desired edges. You can now select another solid.

- Press ESC or the Space bar to drop the tool.
You can now use the Drag on Facet feature of the Materials palette to put different materials sections of the face.


So verwenden Sie das Werkzeug Kante prägen:
- Aktivieren Sie das Werkzeug oder wählen Sie den Menübefehl Ändern, 3D-Objekt, Kante prägen.
- Wählen Sie das zu prägende ACIS-Objekt aus.

- Wenn Sie das Quellobjekt für die Kante löschen möchten, wählen Sie die Option Quellobjekt löschen im Kontextmenü oder in der Kontrollleiste. Diese Option ist standardmäßig aktiviert.
- Wenn mehrere Flächen ausgewählt werden müssen, wählen Sie die Option Prägeflächen auswählen im Kontextmenü oder in der Kontrollleiste.
- Wenn die Option Prägeflächen auswählen aktiviert ist, wählen Sie die gewünschten Flächen aus und klicken Sie anschließend auf Flächenauswahl beenden.

- Falls Sie versehentlich die falsche(n) Fläche(n) auswählen, verwenden Sie die Option Auswahl aller ausgewählten Flächen aufheben im Kontextmenü oder in der Kontrollleiste oder klicken Sie erneut auf die Flächen, deren Auswahl Sie aufheben möchten.
- Klicken Sie zum Prägen auf eine beliebige Kante.

- Wiederholen Sie Schritt 7 so oft wie nötig.
- Klicken Sie auf Beenden, nachdem Sie alle gewünschten Kanten ausgewählt haben. Nun können Sie einen anderen Volumenkörper auswählen.

- Drücken Sie <Esc> oder die <Leertaste>, um das Werkzeug abzuwählen.
Nun können Sie die Funktion Auf Facette ziehen der Materialpalette verwenden, um den Flächenabschnitten verschiedene Materialien zuzuordnen.


Options:
Delete source: When on the source objects for the edges will be deleted. It is on by default.
...