Print window
Create printouts by arbitrarily specifying a window of the desired area of a drawing.
- Go to the Print dialog.
- Change the Print Range to View
- In the View drop-down select Window.
- Press the Define Window button
- Click two points to define the print window.
- When the Print dialog reappears click the Ok button. If you wish to review the print area prior to printing click the Preview button.
Super Selector Modes
Rectangular mode – the default standard bi-directional rectangle selector.
Window Polygon mode - objects completely inside closed polygon will be selected.
- Click and drag to set the first two points of the selection widow.
- Click each subsequent point to define the selection window.
- Double click the last point to close the window and finish the selection.
Crossing Polygon mode - objects crossed by or within a closed polygon will be selected.
- Click and drag to set the first two points of the selection widow.
- Click each subsequent point to define the selection window.
- Double click the last point to close the window and finish the selection.
Fence mode - objects crossed by an open polygon (fence) will be selected.
- Click and drag to set the first two points of the selection widow.
- Click each subsequent point to define the selection window.
- Double click the last point to close the window and finish the selection.
Use Previous Selection
This option in the local menu allows you to re-select the last previously modified selection.
Stellated Polygon
To create a Stellated Polygon:
- Specify the number of teeth
- Specify the Internal and External radii
- If to wish the polygon to be rounded specify the Radius Fillets. (Skip this if you want to set the polygon as a wave)
- If you want there to be a hole in the polygon specify the Hole Diameter.
Then:
- Click to place the center point for the polygon.
- Move the cursor and click to specify the rotation Angle for the polygon
Or:
- Specify the angle value in the Angle field and click the Enter key.
Options:
Stellated as Wave – this option sets an automatic wave curvature for the polygon. When this option is on the Fillet values are ignored.
NOTE: You cannot extrude, revolve, loft or perform similar 3D operations on Stellated polygons. You must explode them first.
Editing Stellated Polygons
You can use the Edit tool to re-arrange and modify a Stellated Polygon.
To Edit a Stellated Polygon:
- Select the polygon.
- Right click, and select Edit Tool.
- Use the node to reshape the polygon.
NOTE: You cannot rotate a Stellated Polygon using the standard rotation handles of the Selector tool. You must use the rotation angle of the polygon itself.
Gear Contour
Definitions:
Diametral pitch – equals the number of teeth of the gear per inch or per centimeter of the diameter, of its pitch circle. For example, if a gear has 32 teeth and a diameter of 8 inches the diametral pitch is four teeth per inch.
Pitch circle – is the circle that passes through the contact point between two meshing gears.
Pressure angle – is the angle at a contact point between two gears. Common values are 14.5, 20 and 25 degrees. However, teeth with smaller pressure angles are weaker. Tgears must have the same pressure angle in order for the teeth to mesh properly.
To create a Gear Contour:
- Specify the number of teeth
- Specify the Diametral Pitch.
- Specify the Pressure Angle.
- Specify the Angle to set the rotation of the gear.
- If you want there to be a hole in the gear specify the Hole Diameter.
Then:
- Click to place the center point for the gear.
Options:
Gear as Pinion – this option align a new gear with a previously created gear.
- Select the Gear as Pinion option.
- Click on an existing gear.
- Rotate the new gear around the old gear until it is located as desired.
- Click to place the gear.
NOTE: You cannot extrude, revolve, loft or perform similar 3D operations on gear contours. You must explode them first.
Editing Gear Contours
You can use the Edit tool to re-arrange and modify a Gear Contour.
To Edit a Gear Contour:
- Select the Gear Contour.
- Right click, and select Edit Tool.
- Use the node to reshape the Gear.
...
- Skip 2D Part draw to render views
- Skip Marks draw to render views
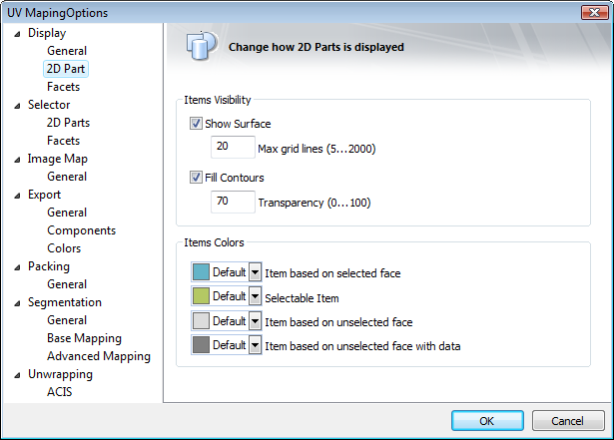
- Show Surface
- Max grid lines (5…2000)
- Fill Contours
- Transparency (0…100)
- Item based on selected face
- Selectable Item
- Item based on unselected face
- Item based on unselected face with data
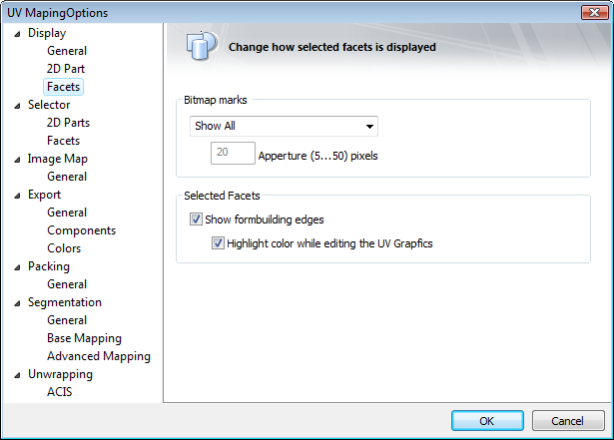
- Bitmap marks
- Apperture (5…50) pixels
Correct spelling = Aperture
- Selected Facets
- Show form building edges
- Highlight color while editing the UV Grapfics
Correct spelling = Graphics
Defined in current Documentation COPY
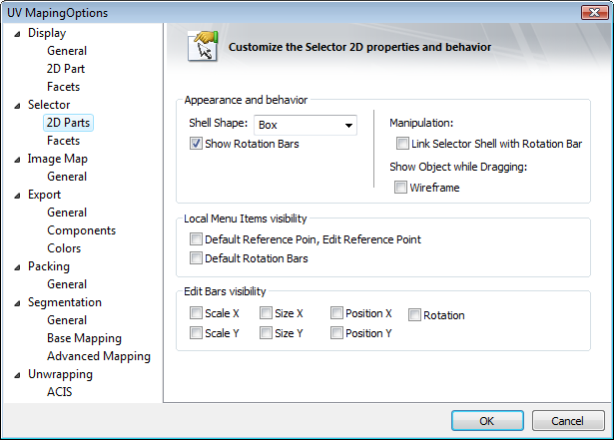
- Local Menu Items visibility
- Default Reference Poin, Edit Reference Point Correct spelling = Point
- Default Rotation Bars
Defined in current Documentation COPY
- Local Menu Items visibility
- Default Reference Poin, Edit Reference Point Correct spelling = Point
- Default Rotation Bars, Lock / Unlock Axis
- Set UCS by Select, Set Selector by UCS Correct spelling = UCS by Selector
Correct spelling = World not 'Word'
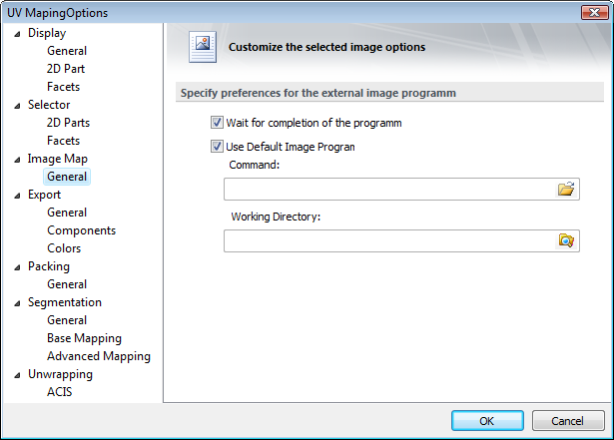
- Wait for completion of programm Correct spelling = program
- Use Default Image Program
- Command
- Working Directory
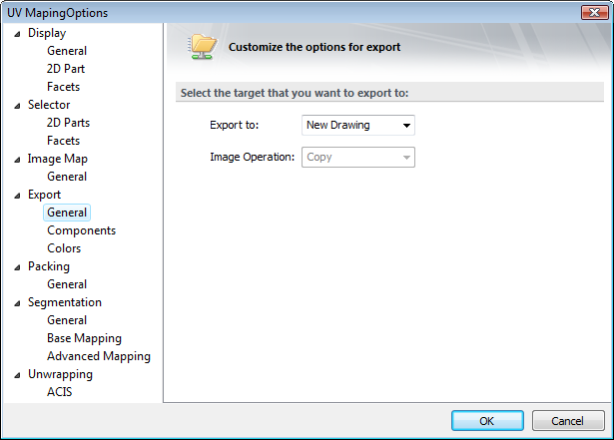
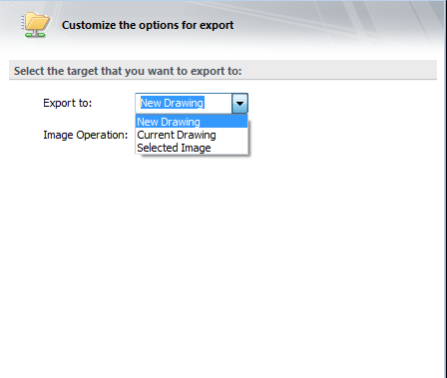
- Export to:
- Image Operation
- New Drawing
- Current Drawing
- Selected Image
- Contours
- Solid Fill
- Surfaces
- UV Rectagle
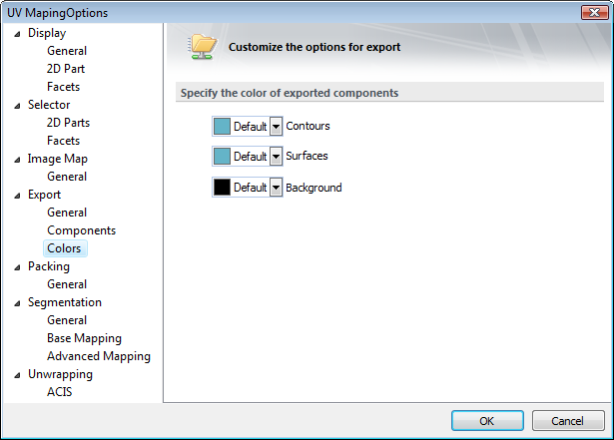
Color for exported components
- Contours
- Surfaces
- Background
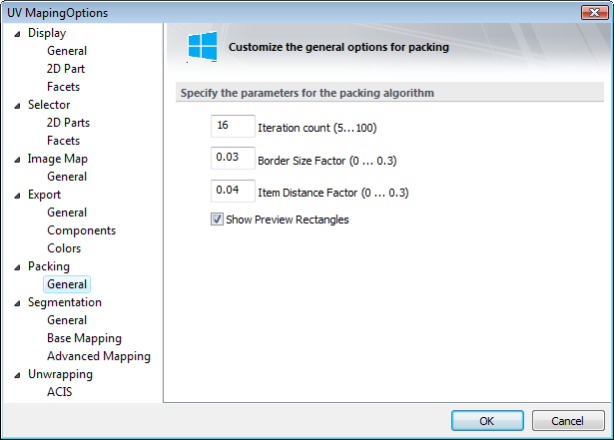
Specify the parameters for the packing algorithm
- Iteration count (5…100)
- Border Size Factor (0…0.3)
- Item Distance Factor (0…0.3)
- Show Preview Rectangles
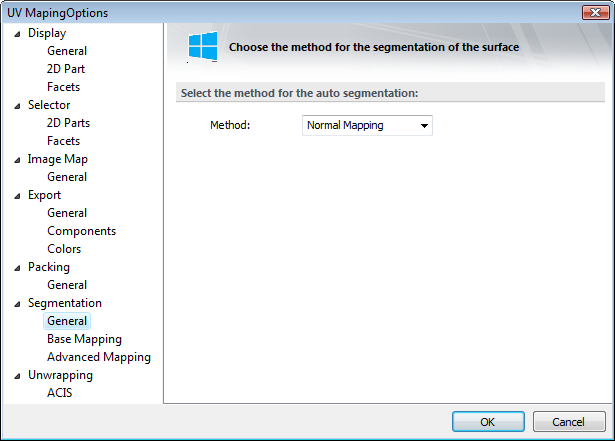
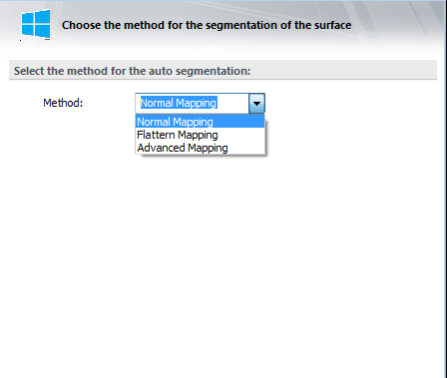
Select the method for the auto segmentation:
- Method
- Normal Mapping
- Flattern Mapping Correct spelling = Flatten
- Advanced Mapping
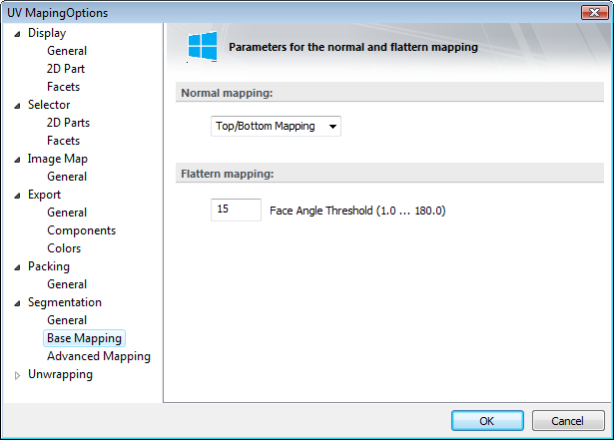
Normal Mapping
Flattern Mapping Correct spelling = Flatten
- Face Angle Threshhold (1.0…180.0)
- Top/Bottom mapping
- Back/Front Mapping
- Left Right Mapping
- Box Mapping
...
- Percent of edges for checking (1.0…99.0)
- Use specific options
- Maximal Correct spelling = Maximum number of edges in the tested path (2…100)
- Minimal Correct spelling = Minimum number of edges in the detected feature (from 1 Greater than 1)
- Threshold distance for the charts merge in percents (1.0…99.0) Correct = Threshold distance for merging charts by percentage (1.0…99.0)
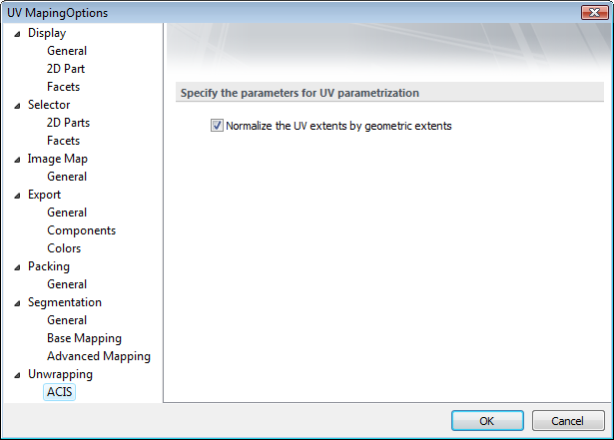
Specify the parameters for UV parameterization
- Normalize the UV extents by geometric extents
...
- Add
- And
- Xor
- Or
- Copy
- Sub
- Blend
- Screen
- Avg
TC Coordinates Export
Menu: Tools|Palettes|TC Coordinates
This palette tool provides the ability to export the point data from your drawing.
TC Coordinates Options
...
- Points (including 3D Points)
Lines:
- End points of lines
- MidPoints of Line Segments
Polylines:
- End points of polylines (including 3D Polylines)
- Vertices of Polylines (excluding endpoints)
- Midpoints of Polyline Segments (including 3D Polylines)
Circles:
- Center points of circles
- Quadrant points of circles
Arcs:
- End points of arcs
- Center points of arcs
- Included points of arcs
- Midpoints of arcs
- Quadrant points of arcs (only those on the drawn segment of the arc)
Curves:
- End points of curves (including 3D curves)
- Control points of curves (exclude end points)
TC Coordinates Advanced Options
Clicking the Advanced button in the TC Coordinates Options dialogue opens the Advanced Options dialogue which allows you to configure how points are to be analyzed and how they are to be exported. These options include:
Point CS mode – specifies what coordinate system will be used to determine the point location. There are four options, World is the defgault.
- World
- User (Current drawing workplane)
- View
- Entity
Object processing mode:
- Use explode to export coordinate of non-default objects – specifies whether blocks, groups and other compound object should be exploded (internally) to compute the point data within them.
Output result mode:
- Add point's type – Appends the points object type to the location data
- Add point's CS mode – Appends the points Coordinate System info to the location data.
- Automatically save to file – Prompts to save the data to file every time you click the Export button.
- Automatically copy to clipboard – Automatically adds the data to the system clipboard when you click the Export button.
Output result format:
CSV Delimiters symbol – Specifies the data divider (delimiter) to be used in output. There are three options.
- Semicolon
- Tab
- Comma
End of Line symbol(s) - Specifies the symbol that will be used to designate the end of line in the data file. There are three options.
- CR + LF
- CR (Carriage Return)
- LF (Line Feed)
Using TC Coordinates
To use TC Coordinates simply click the Export button.
The data area of the TC Coordinates palette will be filled with the relevant data. Depending upon the settings in Advanced options, the system clipboard will be filled with the data and/or the Save As dialog will open so that you can save the file.
NOTE: It is important to delete the contents of the data area of the TC Coordinates palette after each use, or before subsequent use. The palette will not automatically delete data and will simply add new data to previous data each time you click the Export button.
To delete the content of the TC Coordinate Palette:
- Click in the palette.
- Press CTRL+A keys to select everything in the palette.
- Press the Delete key.


