Anchor
For objects that are based on a 2D profile, you can edit the profile in Select Edit mode (see Select Edit).
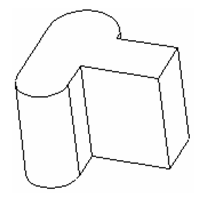
This example will use a Simple Extrude object, created from a closed polyline. 
- In Select mode, select the object. Right-click and choose Select Profile from the local menu.

Warning: The workplane moves to coincide with the selected profile. This may change the workplane you want to be active. If needed, you can use Previous to return to the desired workplane. - You can move, rotate, or scale the profile as you would any 2D object in Select Edit. See Select Edit.

- Once the profile is edited, click outside to return to the 3D object, and click outside again to clear the selection. (You can also press Esc twice to exit Select mode.) The object is now based on the edited profile.

...
Editing Multiple Profiles
Some objects like truncated cones and lofts use multiple profiles. You can access and edit each profile separately.
This example will use a truncated cone.
- In Select mode, select the object. Right-click and choose Select Profile from the local menu.

- If the selected profile is not the profile you want to edit, right-click again and choose Select Next Profile. You can use this method to scroll forward and backward (Select Previous Profile) until you reach the desired profile.

- Edit the desired profile as needed to change the object.

...
Editing
...
Nodes
...
of
...
a
...
Profile
...
If you want to edit profiles beyond the moving, rotating and scaling possible in Select Edit, you can also edit profile nodes. For details, see Edit Tool.
- In Select mode, select the object. Right-click and choose Select Profile from the local menu.

- Right-click again and select Edit Node, or click Edit Node in the Inspector Bar.

The profile nodes appear.

- Drag the nodes as needed to change the profile shape.

- Return to Select mode, and then clear the selection, by pressing Esc twice.

...
Updating
...
Compound
...
Profiles
...
Anchor
This example uses these three closed 2D compound profiles, but simple profiles will work as well.

- In this example, a Simple Extrude will be created (see Profile Objects). Make sure Use Compound Profile is selected.

- Select one profile, then press Shift and select the other two.

- There are two ways to update the profile:
...
- Click one profile to deselect it.

- When the profile is modified, select Finish Selection of Profile.

The extrusion updates to reflect the selected profile curves.
You can also use this tool to add or delete regions from multiple-compound region extrusions. You can also select profiles that were previously unused.
Finally, you can update a 3D object that is based on a simple profile to be based on a compound profile (but not vice-versa). In this example, the extrusion is based on a circle, and was not created using Use Compound Profile.
- Select the extrusion, and select Select Profile. Right-click again and select Update Compound Profile. Select the compound profile.

- Click Finish Selection of Profile, and the extrusion is now based on the compound profile.

While creating solids based on compound profiles, it is recommended to work with Editing History active (see Editing 3D Objects using Selection Info). This ensures that you will be able to modify the profiles in Select Edit mode.