Anchor
...
Note: The Fill Schedule Wizard is another way to add a schedule, that scans for objects on specific layers. See |#Rure13793.
...
Note: If you want to save styles to a template, see Saving as Templates.
...
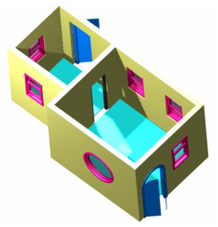
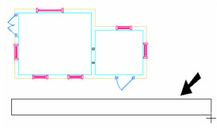
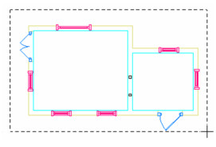
- This example starts with a model that has walls and slabs. There are two types of windows and three types of doors.
Note: For details on these components, see: WindowDoorSlabs
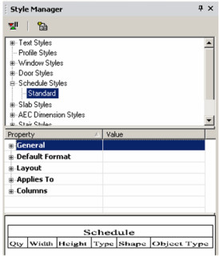
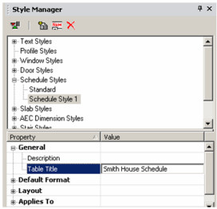
In the Style Manager, there is one style, "Standard," listed under "Schedule styles."
- You can change the "Standard" style, but if you want to preserve this style, make sure "Standard" is highlighted, then click Create New Style.
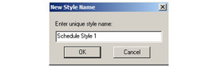
- Assign a name or accept the default.
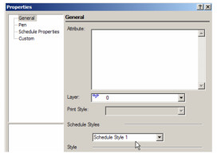
This creates a new style which is a copy of "Standard." - Highlight the new style, and open the General category. This is where you can define the schedule title.
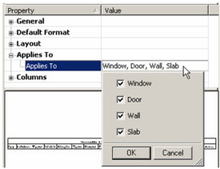
- Default Format and Layout contain various options for the text and cells in the table. Next to Applies To, click the Value field to specify which components you want to include in the schedule.
- To specify the columns, click the Value field next to Columns.

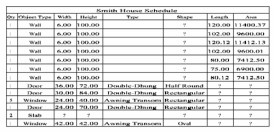
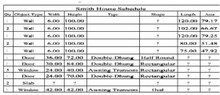
- This opens a menu from which you can select the schedule's columns. To move a column up or down, highlight it and click Move Up or Move Down. In this example, Object Type was moved to the top of the list.
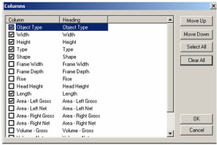
- If you want to change the name of a column, click its name in the Heading field. In this example, "Area - Left Gross" was changed to "Area."
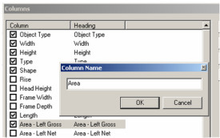
- Click OK to end the column definitions.
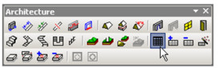
- This is the icon for Schedule. Right-click on the tool to set the tool's Properties
- Open the Schedule tool's Properties to the General page.
- Switch to World Plan view. Activate Schedule, and click two corners to define the schedule's width.
When first created, the schedule contains only the title and column headers.


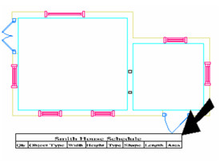
- To build the schedule, select Add Object to Schedule.
- First click the schedule you want to add to, then select the windows and doors to include. Use Shift to select multiple objects, or use a selection window.
- When finished, select Finish from the local menu or Inspector Bar. The windows and doors appear in the schedule.
- If you want to remove objects, use Remove Object from Schedule. All schedule objects are highlighted; select the windows and doors you want to remove. Select Finish, and the objects are removed from the schedule.
...
Fill Schedule Wizard
![]()
The Fill Schedule Wizard enables you to scan your drawing for objects to include in the schedule; you do not have to select objects manually. The wizard scans for specific types of objects on specific layers, which is useful for large drawings which may have objects on invisible layers, or in which slabs are not easy to select because of multiple floors.
- This examples uses a model that has walls and slabs. There are two types of windows and three types of doors.
- Use the Style Manager to create a schedule style (see Schedule Styles).
- To create the schedule with the new style, open the Schedule tool's Properties to the General page.
- Switch to World Plan view and use the Schedule tool to place the schedule, by clicking two corner points.
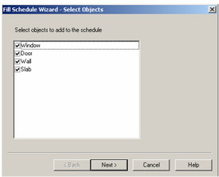
- Select Fill Schedule Wizard.

- Click the schedule you want to fill.
- In the wizard, check the types of objects to include. (The list that appears in the window depends on what was defined as part of the schedule style.) Then click Next.
- Select the layers you want to include in the scan, and click Next.
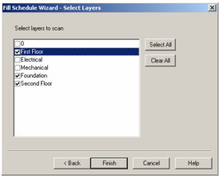
Note: For details on layers, see Snap Modes.
The schedule is filled with all objects found on the selected layers.