Drafting Reference Point
Available in TurboCAD Pro and Pro Platinum Only
Note: It is important that the Create Editing History option in on (Options|ACIS) if you want boolean operations to be recorded in a part or assembly. Otherwise the part/assembly will be deleted since it is essentially a new object.
You can adjust he location of the Reference point for a Drafting object in the following manner. Reference point functionality applies only to the WorldCS and WorkplaneCS, it isn't allowed for EntityCS. WorldCS is the preferred mode.
Note: it is important understand that using the WorkplaneCS will mean the composite WorkplaneCS of all the source 3D entities for Drafting Part/Assembly. The default Reference point will therefore be the Center of Extents of all these entities, not the original as is the case with the WorldCS.
You can also turn Reference point functionality on and off.
- Create the drafting object from sphere with followed options turned on.
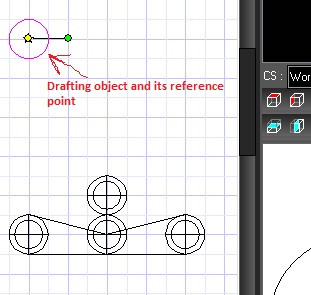
- With the New drafting object created, the reference point position will be defined automatically according to center of extents of the source entities. The Reference point is defined for the DRAFTING PART (with all of its drafting objects), not for each single drafting object within it:
- Add other 3D parts to the sphere to change the drafting object (The position is always related to reference point)
- To define new reference point, right click on PART object in thedrafting tree and select Define Reference Point:
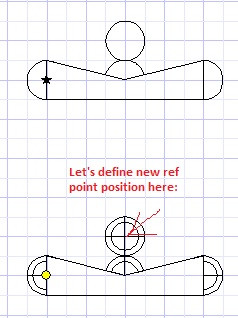
- Click to define the new reference point position for the PART in Model Space:
- All drafting objects within a part where reference point position was changed will be updated accordingly to new reference point position:


