Editing Environments
- Brian Carter (Unlicensed)
Menu:* Options / Environments / Edit EnvironmentThe Render Scene Environment Editor can also be accessed from the Render Scene Environment page of the Drawing Setup. You can also access it from the Environments Palette; select the item in the palette, then right-click and select Edit Environments. Or double-right-click on the item, or click Edit Environments. 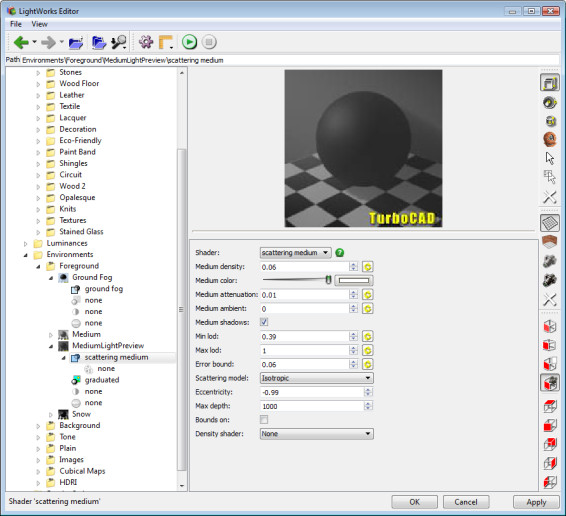
Right clicking on tree elements provides a variety of functions.
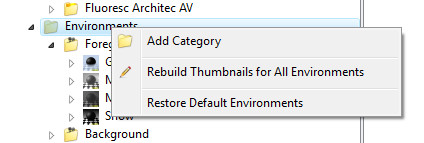
Right clicking on Environments allows you to:
- Add Category
- Rebuild Thumbnails for all Environments
- Restore Default Environments
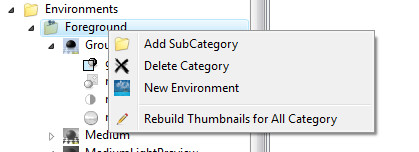
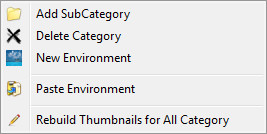
Right clicking on a Category allows you to:
- Add SubCategory
- Delete Category
- New Environment
- Rebuild Thumbnails for all Category
If an environment has been copied you will also be allowed to:
- Paste Environment
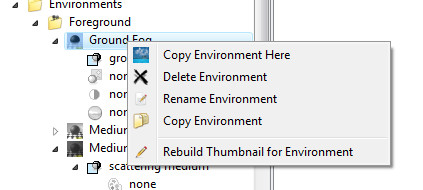
Right clicking on a Environment allows you to:
- Copy Environment Here – adds a copy of the selected environment to the bottom of the current category.
- Delete Environment
- Rename Environment
- Copy Environment – copies the environment so it can be pasted elsewhere.
- Rebuild Thumbnail for Environment
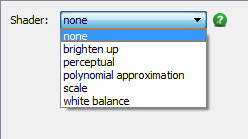
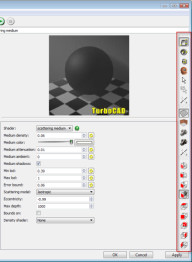
Each environment consists of four categories: Foreground (fog, light scattering, etc.), Background (clouds, planes, images, etc.), Tone (Brighten Up or Scale), and Global Environment (Cube, Panorama, etc.). These categories are found on the left side of the Render Scene Environment Editor, and each has its own relevant parameters. 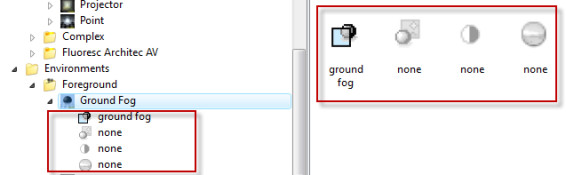
In the example above, the environment Ground Fog has two sets of parameters: Ground Fog (fog parameters) and Graduated (top and bottom colors). Other environments have different parameters.If you switch to the background environment Clouds, you can edit parameters for Clouds (color and scale of clouds).

For any environment you can add set of parameters to the existing defaults. Highlight any None page and select a set of parameters from the dropdown list. In this example, you can add snow to a cloudy background.
In the Preview section, you can change the shape and orientation of the preview object and desk (the surface beneath the object). Under Options, you can toggle the display of the preview object or desk. If Auto Update is checked, the preview will update each time a change is made (otherwise you must click the Preview button).
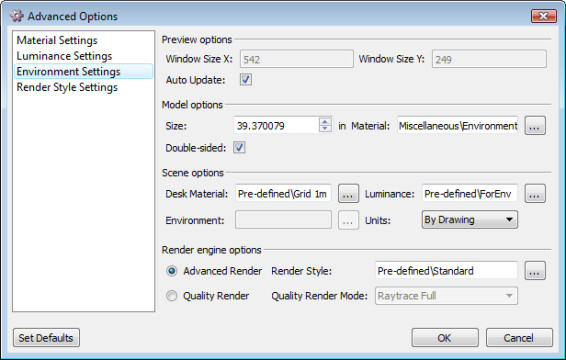
The toolbar on the right side of the editor allows you to specify the elements of the preview.
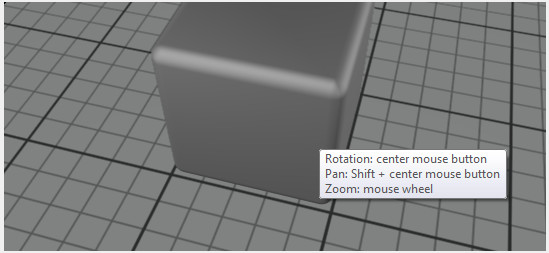
You can navigate within the preview window using the center mouse button.
For any documentation issues please email:
Documentation@imsidesign.com