You can find any tool by the Menu Structure HERE: https://turbocaddoc.atlassian.net/wiki/display/TC21UG/Menu+Structure
You can find the menu location of any tool by name HERE: https://turbocaddoc.atlassian.net/wiki/display/TC21UG/Tools+Mapped+to+Menus
Editing Splines and Bezier Curves
In addition to adding, deleting, or moving nodes, there are several Edit Tool features unique to splines and Bezier curves.
Changing the Shape of a Spline or Bezier Curve
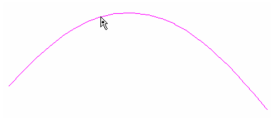
- Use the Edit Tool on the curve you want to edit.
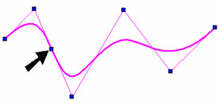
- Click and drag any point along the curve.
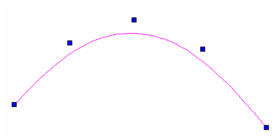
The control points update accordingly.
Changing Control Points and Fit Points
Splines are created by specifying either a series of fit points (points through which the spline passes) or control points (guide points). For either type of spline, you can view and move both types of points.
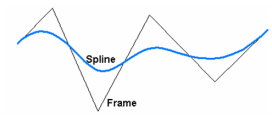
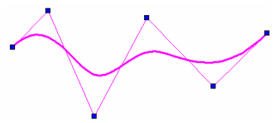
It is easier to understand the types of points when the spline is displayed with its frame. Open the spline's Properties to the Curves page and check Show Frame.
- Use the Edit Tool on the curve you want to edit. By default, Edit Control Points is active in the Inspector Bar and local menu.
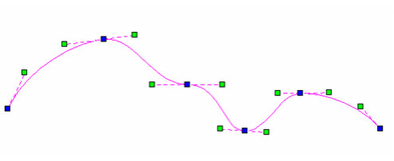
- The control points are highlighted at the ends of frame segments. Each point can be clicked and dragged manually or assigned values in the Inspector Bar or Coordinate Fields.
- Switch to Edit Fit Points.
- Now the points through which the spline passes are highlighted. If the spline is open, you can use the green points to change the slope at the spline ends.
Note: Control points and fit points are not available for Bezier curves. For details on node-editing Bezier curves, see Curve Properties.
Adding Nodes and Knots
A knot is basically a control point. You can add knots to increase the editing detail of a spline. A node is a point through which the spline will pass (fit point).
- Use the Edit Tool on the spline you want to edit. In this example, the frame of the spline is displayed (check Show Frame on the Curve page of the spline's Properties).
- It does not matter whether fit points or control points are highlighted. To add a control point (knot), right-click on the spline (not on the frame) where you want to add a knot and select Add Knot. The control point is added along the frame.
- If you continue adding knots, you can "tighten" the frame to the spline, providing more control points for editing.
- To add a fit point (node), right-click on the spline, near where it passes through the frame. Select Add Node. The fit point is added along the frame.
- If you continue adding nodes, you can "tighten" the spline to the frame, providing more fit points for editing.
Note: Nodes can be added to Bezier curves as well, but knots can be added only to splines.
Changing Node Curvature of Beziers
Bezier curve use weighted nodes to control the curvature at each node point.
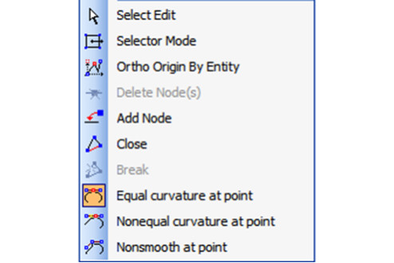
You can control how each node controls the curvature by selecting a node, and right clicking to open the local menu. In the local menu there are three options for controlling the curvature of a node.
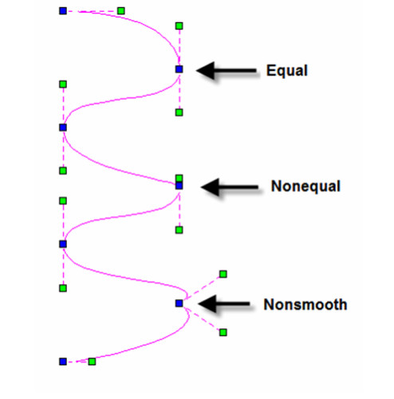
Equal Curvature at point — This is the default. When selected, adjusting one of the green control handles causes the paired handle to change an equal distance, but the handles remain locked to a common control line. This option makes the curve smooth and equal on both sides of the node.
Nonequal Curvature at point — When this option is selected, adjusting one of the green control handles does not affect the distance of the paired handle, but the nodes remain locked to a common control line. This option makes the curve smooth but unequal on either side of the node.
Nonsmooth at point — When this option is selected, adjusting one of the green control handles does not affect the the paired handle at all, the nodes have separate control lines. This this option allows you to make a sharp point in the curve.
Note: These controls will have no effect if the "keep Curve Smooth" option is turned off in the curve properties. Curve Properties.
The effect of selecting a different curvature only appears after you begin moving an affected handle.
Selector Mode in Edit Tool
You can use the Selection tool functions to edit nodes by turning on the Selection Mode. Selection mode is available from the local menu or from the Inspector bar.
While in this mode you can select multiple nodes and move them, rotate them, and scale their collective size just as you would any other object using the selector.
Note: The selector type (2D or 3D) that will be used in Edit tool is dependant upon the type that is current for the selector.

