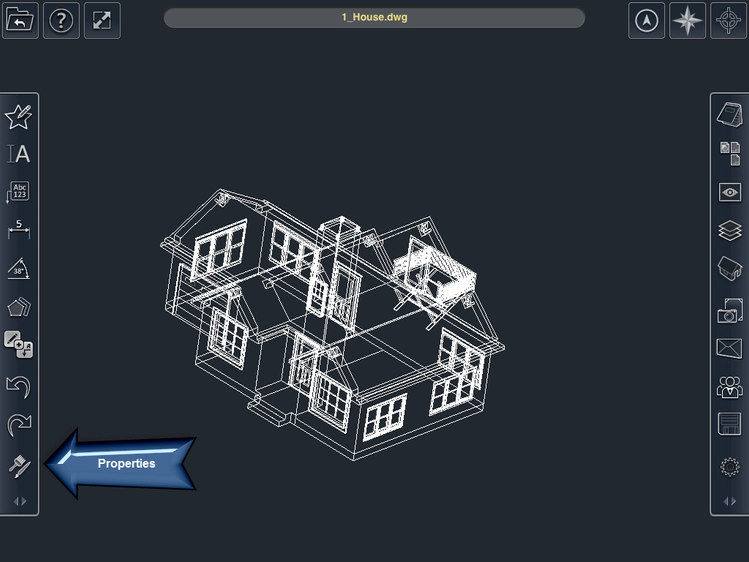
Properties
- Brian Carter (Unlicensed)
The properties dialog is divided into four sections: Line, Fill, Text, and Units. Properties pertain to object created in TurboSite, and not to objects in the original file.
Line Properties
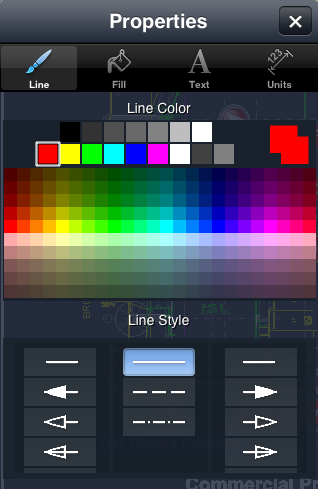
Line properties affect the appearance of lines, and are divided into two areas:
Line Color – Tap on a color to assign it as the color of the line.
Line Style:
- Start-Point Arrow – Sets the arrow style for the start point for objects with arrows e.g. Linear Dimensions, Leaders. Tap on a arrowhead to select it.
- Line Pattern – sets the patten for the line. Tap on a pattern to select it.
- End-Point Arrow – Sets the arrow style for the final point for objects with arrows e.g. Linear Dimensions. Tap on a arrowhead to select it.
Fill Properties
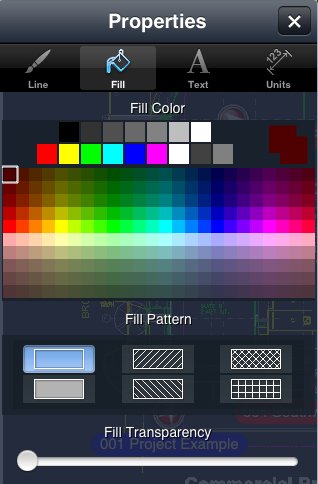
Fill properties affect the appearance of filled shapes, and are divided into three areas.
- Fill Color – Tap on a color to assign the filled area of closed objects e.g. rectangles. Fill color will not be apparent if No-Fill is selected.
- Fill Pattern – Tap on a pattern to set the way closed areas will be filled. The first pattern, which is the default, is No-Fill.
- Fill Transparency – Slide to set the transparency of the fill from 0 to 100%
Text Properties
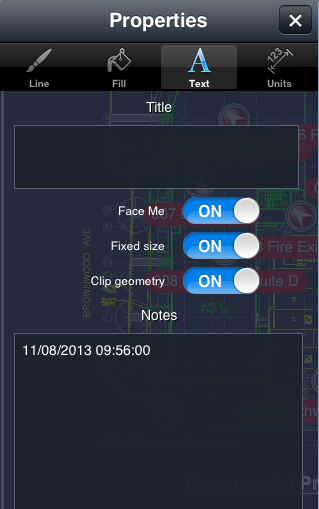
Text properties affect the appearance of text, and are divided into thee areas:
- Title – Tap and type to enter the title for the object. For objects with associated text, Text and Leaders, the Title controls the text displayed.
- Options – these on/off options further control how text displays:
- Face Me – When this option is on text will always appear facing the user and oriented horizontally. If off text will rotate and orient with the drawing.
- Fixed size – When on text remains the same size regardless of the level of zooming. If off text will scale with zooming.
- Clip geometry – When on geometry behind the text boundary or text box will be hidden.
- Notes – Tap and type to enter the details for the object. Details allow you to add additional notes and data to your object.
Units
Unit properties affect the appearance of dimensions.
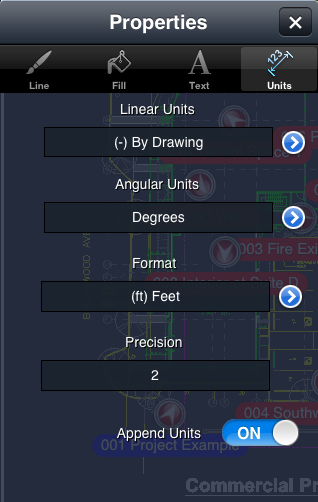
Linear Units control the type of unit used for linear dimensions.
To set linear Units:
- Tap the adjacent Blue arrow button to open the Linear Units dialog
- Tap on the desired unit type.
The '-By Drawing' option sets the Linear Units type to the same as your original file.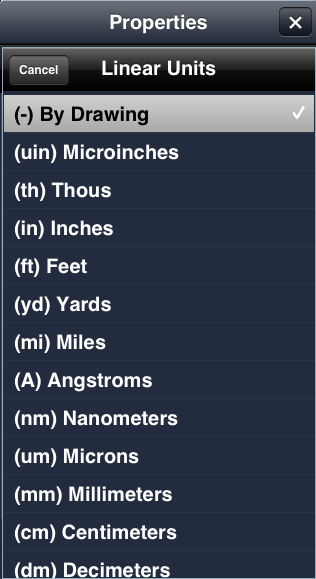
Angular Units control the type of unit that is used for angular dimensions.
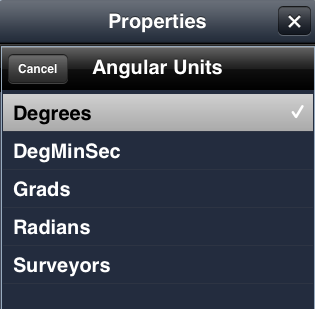
To set Angular Units:
- Tap the adjacent Blue arrow button to open the Angular Units dialog
- Tap on the desired unit type.
Format sets the layout pattern and style for dimensions
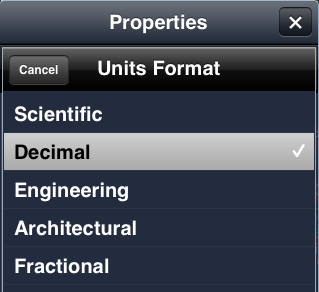
To set the Units Format:
- Tap the adjacent Blue arrow button to open the Units Format dialog
- Tap on the desired format type.
Precision sets the number of decimal unit places that will appear in dimensions. Simply tap in the field and type in a number.
Append Units specifies whether or not dimensions will show the unit type after the value.
Editing Properties
To edit the properties of any tool:
- Select the Tool.
- Select the Propeties button
 .
. - Adjust the properties.
- Close the Properties dialog.
To edit the properties of any object:
- Select the Object.
- Select the Propeties button
 , or tap the Properties icon.
- Adjust the properties.
- Close the Properties dialog.